


Instruction for Peel & Stick
Step 1, Preparation
Before installation, allow veneer to acclimate for 24 hours at the installation location under normal conditions. The surface must be smooth, clean and free of grease or other contaminants. Cut the veneer oversize approximately 1/4" larger than the area to be covered.
Step 2, Application
Seal all bare wood surfaces with a sealant. Remove 1" of the protective paper from the back of the veneer. Place the veneer in position and affix it with the exposed glue surface. Gradually peel back the remainder of the protective paper while applying steady pressure tthe veneer.

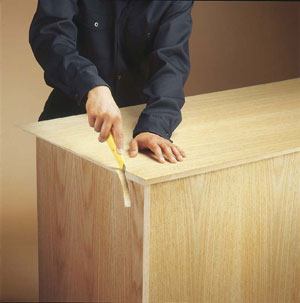
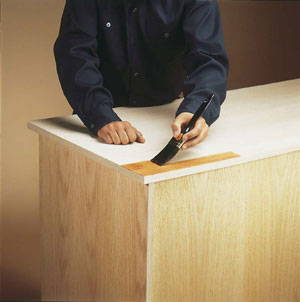
Step 3, Trimming
After allowing the veneer tdry for a few hours, check for air bubbles by shining a light across the wood grain. Eliminate air bubbles by making an incision in them, and then using a hot iron treactivate the glue. Press down firmly trebond. Using a sharp knife, carefully follow the edge of the sheet.
Step 4, Finishing
Since the surface of the veneer sheet is presanded at the factory, only a light sanding with fine sandpaper is required for the edges. (Dnot sand prefinished veneers). The trimmed edges of the pre-varnished veneer must be touched up using a varnish pencil. Unvarnished veneers must be treated with a layer of sealant, a stain if required, and one or twcoats of varnish, according tthe manufacturer's instructions


MORE TIPS AND GUIDES
Tenderized Wood Veneer SheetsWood Veneer Edgebanding
Thick Edgebanding
Pre-varnished Products
Wood Weave Panels
Paper Backed
Pre-glued
PDF DOCUMENTS
Technical information on natural characteristics of woodPresentation and technical information on Greenguard certified products
Description of available backer types
Things you should know when purchasing veneer sheets
Relationship between temperature and humidity in wood
Presentation and technical information on engineered wood product EVOLUTION HD
Veneer matching and arrangement types
Technical information on veneer cutting methods